Before you install your wireless router, make sure that the Internet Protocol (TCP/IP) Property settings on your computer are set to “Obtain an IP address automatically ” using DHCP and for DNS settings "Use the following DNS server address' where you can enter the DNS address of your choice. You can check these settings by looking at the TCP/IP Properties of your Internal Network Connections, which are accessible through the Control Panel of your computer.
 To connect the wireless router, the computer, and the modem:
1. Turn off your computer.
2. Turn off and unplug the broadband modem.
3. Locate the cable (A) that connects your computer to the modem.
4. Disconnect the cable at the modem end only (B). You will connect it to the router later.

5. Locate the Ethernet cable that came with your NETGEAR product. insert one end of this Internet cable (See below) into your modem (C) and the other end into the Internet port of the wireless router (D). (The cable and the Internet port label are color coded.)

6. Locate the cable (A) that is still attached to your computer (see below). Insert that cable into any one port (1-4) on the router, such as port 4 (E), as shown in figure below.

7. Connect any additional wired computer to your router by inserting an Ethernet cable from one of these computers into one of the three remaining LAN ports.
8. Review that your network is now set up (as seen below); you are ready to start your network.

9. Start your network in the correct sequence, as mentioned below.
So much for the hardware connections. Power up the Netgear WiFi router & desktop computer. Now lets get to the basic configuration of the Netgear wireless router.
This is how I have done it successfully so you can too.
Open IE6/IE7 or Firefox browser and type 192.168.1.1, a window will pop up & ask for username & password. Default username is ‘admin’ & default password is ‘password ‘ both in lowercase letters. (For security reasons, the router has its own user name and password.) next you will come to the screen as seen below. The password can be changed later.
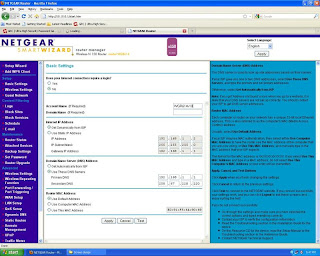
As I mentioned above the first thing we have to do is to change the IP of the wifi router as it clashes with that of the ADSL modem. For that click on the ‘LAN Setup’ on the right side tab to come to the pic seen below.
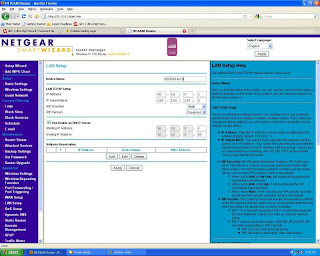 Enter a device name of your choice
IP Address: 10.10.0.1
Subnet mask: 255.255.255.0
Next two entries are left as it is
Select check box ‘Use router as DHCP server’
Starting IP Address: 10.10.0.2
Ending IP address: 10.10.0.50 (you can specify a number upto 255 but I would suggest limit this number to what ever number of device you envisage will connect to your WiFi (I normally use 5-10).
Click on ‘Apply’
At this point you will loose contact with the wireless router through the browser. Double click on the computer icon in your task bar & go to the ‘Support’ tab and see the IP taken automatically by the machine will most probably be 10.10.0.2. Now type 10.10.0.1 in the browser location bar to gain access on the configuration page of the router.
Click on ‘Setup Wizard’ in the right side tab to get the following.
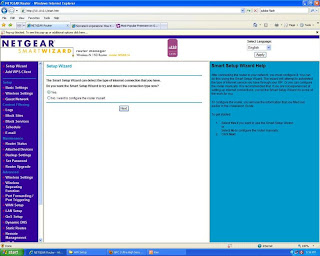 Click on ‘Yes’ & then on ‘Next’ to arrive at the pic shown below
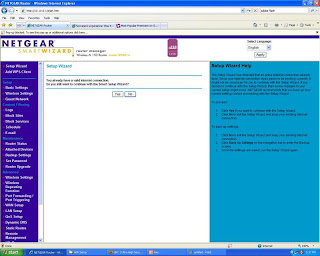 Click on ‘Yes’
Now switch on the D-Link 502T and after the lights become steady, on the desktop click on ‘Start’ button -> ‘Run’ & type ping 192.168.1.1. If you get ‘timed out’ message, then there is some error, so go over all points above to see if you have missed anything. If you see a reply like the pic below all is well. You could also open another tab & try to browse the net.

You should be able to access the Internet on your desktop. Hurray So far so good, remember that your network is still unsecured and we still have to configure the security settings etc.
After that click on ‘Wireless Settings’ in the right side tab to arrive at the pic seen below
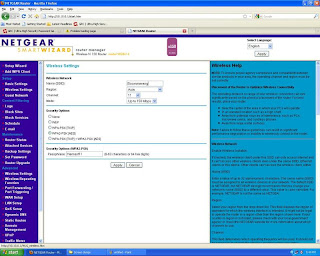
Give your network a name, the network name is also called SSID next
Region: Asia
Channel: 11
Mode: upto 150Mbps (there are three modes ‘upto 54 Mbps’ ie ‘g’, ‘upto 75 Mbps’ ie ‘b’ or ‘g’, ‘upto 150Mbps’ ie ‘n’).
In
Security Options: WPA2 PSK (AES) currently considered the best, below that enter the
Passphrase: (I enter a 63 character password)
Click on ‘Apply’
See
https://www.grc.com/passwords.htm
https://secure.pctools.com/guides/password/ for password generation.
You can now turn to your wireless PC or laptop to connect it to the wireless network. Here I am assuming your laptop has a built in WiFi card, if you are using an adaptor then follow the instructions of the adaptor maker. XP has a very user-friendly wireless networking utility. If you’re setting up a network for the first time, use the Windows Wireless Network Setup Wizard, in the Control Panel. This copies configuration info to a USB flash drive that you can insert into each additional PC or device. If you use Vista/Win 7 (like me) it’s just as easy going thru the Control Panel for first time users. After you have gone thru the setup wizard and it has recognized the network with the name you had previously given it, enter the password where asked (When you use a password 63 or 64 characters long copy paste it in your WiFi router then save the password in ‘Notepad’, then transfer this password to a pendrive & paste it in your laptops.) now you should be able to access the Internet. So far so good but not quite good enough. We now have to set up the MAC filters.
In the right side tab go to ‘Advanced’->’Wireless Settings’
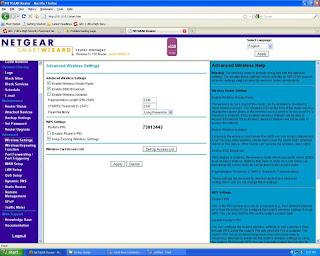 Enable ‘Wireless Router Radio’ & ‘Enable SSID Brooadcast’ & ‘Keep Existing Wireless Settings'’ Then click on the button ‘Set up Access List’ to get the pic seen below.
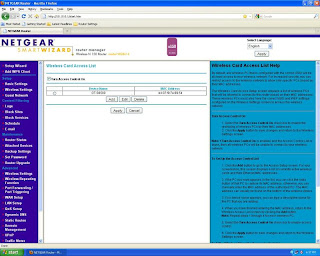
Click on ‘Turn Access Control On’.
Here you will see the gadgets that are connected to your WiFI network..
Click on ‘Add’ & enter the name & MAC address of the device.
Select the relevant radio buttons.
Click on ‘Apply’
PS Remember that now to access the router thru the browser the address is 10.10.0.1 and NOT the one you will find in the user guides (192.168.1.1). And to access the D-Link 502T thru browser you type 192.168.1.1. Happy surfing.
To find the MAC address of your computer go to http://socrates0.blogspot.com/2007/12/how-to-configure-linksys-wrt54g.html for your Samsung Wave GT-S8500. see below
Open menu in you Samsung Wave
Then open “Settings”.
Scroll down to open “About Phone"
Once you open “About Phone”, go to “System Info"
then open “System Info” & in tab named “Device” you will get the MAC address .
A few useful sites are mentioned below.
http://www.whatismyip.com/
http://downforeveryoneorjustme.com/
http://www.dslreports.com/tweaks
https://www.opendns.com/
http://speedtest.net/
http://pingtest.net/
http://airtel.in/speedcheck