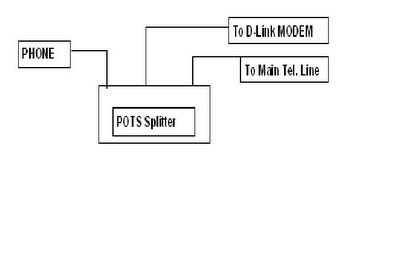
One of the most important things is read & take very seriously the message by MTNL about the Tel. wiring in your house. The main telephone wire should first come to the POTS Splitter (comes with the D-Link 502T router), to the socket called ‘LINE” on the splitter. (See diagram below). The wire from the socket called ‘MODEM’ should lead to the D-Link router & the wire from the socket called ‘PHONE’ should lead to a phone or the phone network in your house. The wiring of the router is shown in the MTNL user guide so not mentioned here.
1) You will get a small dialogue box where the user name is admin & password is also admin.
2) Once you have logged in, the HOME directory tab is prominent with the Setup Wizard menu displayed. Click on the ‘Run Wizard’ button in the middle of the screen. A pop up menu will appear. This is the Setup Wizard.
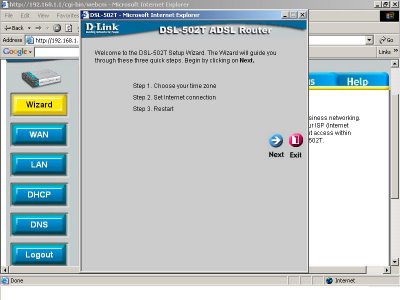
3) This procedure consists of
(a) Setting the time zone
(b) Set the Internet connection
(c) Restart the router.
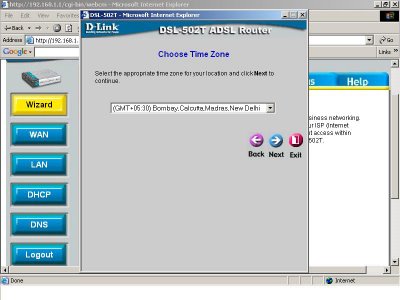
4) Click on the Next button & configure the Time Zone by selecting the appropriate time zone. Click on the Next button after you have made your choice.
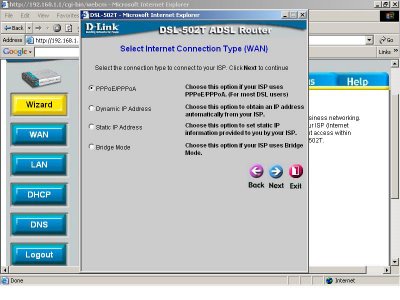
5) Next you have to set the Internet connection type for the WAN interface. On the screen that you see (shown below) select ‘PPPoE/PPPoA’ and click on Next.
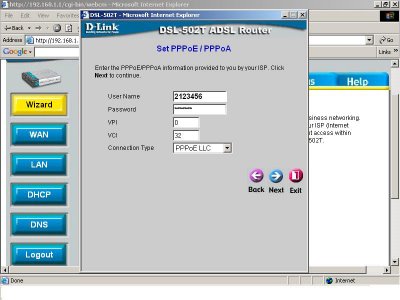
6) In the screen as seen below type in the Username (Your Tel No) & your Password (your CA number, Customer Identification number). This available on your tel bill. VPI should be 0 (zero) and VCI as 32.
These VCI & VPI I have mentioned above is basically for MTNL for the other ISP’s in India it’s the following
Connection Name
|
VPI
|
VCI
|
MTNL
|
0
|
32
|
BSNL
|
0
|
35
|
Airtel
|
1
|
32
|
VSNL
|
0
|
33
|
Connection type should remain as PPPoELLC. Click Next and skip to the Setup Completed menu below.
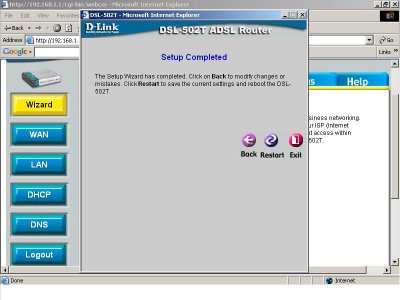
7) Setup Competed: click on the Restart button. At this stage you will get another screen telling you that the ‘The system is now restarting. Please wait’. Please do not turn off the router while it is still displayed
 What is mentioned below is what is done by the MTNL staff to configure the router when they install it at your residence & this is not know to most users.
http://socrates0.blogspot.com/2007/12/how-to-configure-linksys-wrt54g.html

7) Setup Competed: click on the Restart button. At this stage you will get another screen telling you that the ‘The system is now restarting. Please wait’. Please do not turn off the router while it is still displayed
 What is mentioned below is what is done by the MTNL staff to configure the router when they install it at your residence & this is not know to most users.
After you have done the above mentioned settings Click on WAN on the left side of your screen & you will see a screen as seen in Fig 1a.
In the 1st field PVC click on the list box (the downward pointing arrow) & select ‘PVC0’. Scroll down (Fig 1b) and click on the ‘Apply’ button seen below.
Next click on the ‘TOOLS” button in the horizontal tab seen below and then click on the ‘SYSTEM’ button, scroll down & click on the ‘Save & Reboot’ button. This may take some time, it may also happen you get the browser error ‘Page cannot be displayed’ in that case click on the Refresh button.
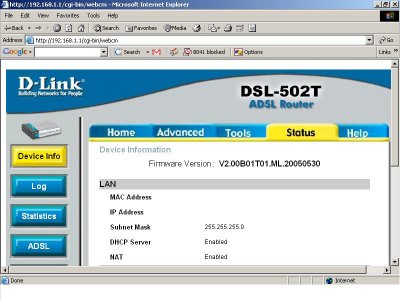
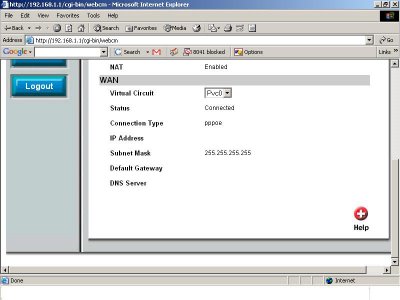
Now you should get a similar screen as seen below (seen in two parts) where the status should be seen as ‘Connected’. You can click on the STATUS button and check the status of your connection. You are now ready for a broadband experience.


PS: You will notice that in the last two screen dumps some fields are blanked out, that in no way should reduce the significance of the overall picture :)
After this is done you can follow what is mentioned in the user guide to change your password, create your email id etc.
All those who want to use a wireless router in conjunction with the above gadget can see the link given below. I used a Linksys WRT54G ver 7.00.1 ) http://socrates0.blogspot.com/2007/12/how-to-configure-linksys-wrt54g.html
A few useful sites are mentioned below.
http://www.whatismyip.com/
http://downforeveryoneorjustme.com/
http://www.dslreports.com/tweaks
https://www.opendns.com/
http://speedtest.net/
http://pingtest.net/
http://airtel.in/speedcheck
https://www.grc.com/passwords.htm
https://secure.pctools.com/guides/password/
http://www.whatismyip.com/
http://downforeveryoneorjustme.com/
http://www.dslreports.com/tweaks
https://www.opendns.com/
http://speedtest.net/
http://pingtest.net/
http://airtel.in/speedcheck
https://www.grc.com/passwords.htm
https://secure.pctools.com/guides/password/


