I am writing this as I find new tips/tricks & hidden features on this phone a Samsung Galaxy Ace running Android 2.3.4 GINGERBREAD.DDKQ6 which is now available for users in India. This is not a review or spec sheet for this phone, as you can find ample of that on the net.
One of the first thing that a first time user (like me) of an android phone hears, is that the battery performance is poor this is true to an extent as the battery technology has not kept up with the facilities that are now offered & used on these smartphone.
Some of the features that I have switched off as the obvious suspects like WiFi/Bluetooth/GPS. In WiFi setting there is a ‘Network Notification ‘ which helps in checking & informing if there is a wifi network in your neighbourhood. Frankly I find this unnecessary as I would prefer to check this ONLY if & when I need a WiFi connection. Of course keeping this ‘on’ is a drain on battery power as well as a security risk.
If you do not use 3G then make your Network mode as ‘GSM only’ else your phone will forever try to search for 3G signals which you have not subscribed for & drain your battery. If you have subscribed for 3G then do not so the previous point but switch off ‘Data roaming’ unless someone else is paying your bill.
If you have installed apps on your phone many of them access your GPRS without your knowledge (actually we agree to it when we download & install them but how many read carefully the ‘Permissions’ tab). I found some apps, which I need doing this, I even noticed data being downloaded when I was scrolling thru my Home screens in such a case switch off the ‘Use packet data’ option. If you are a GPRS user then install a GPRS on/off app to make this easier.
When I first started downloading apps onto my phone I was asked to login to my Gmail a/c thru my phone, which I did but even though I opted against syncing my contacts it did anyway. I also noticed that the phone would try to auto sync my mail when I did not need it in such an eventuality I have opted for deselecting ‘Background Data’ which enables applications to sync, send & receive data at any time. (Found in ‘Accounts & sync settings’). This is fine when I am in my wifi range but not otherwise, so I did this. There is also separate option for switching off auto sync off. I have still to investigate why these two are separate. But remember to switch on (select check box) ‘Background Data’ when you try to download an app else it will not come thru :)
To check whether an installed app has an update you will have to visit ‘My apps’ section of Android Market. Items that have a new version available will say ‘Update available’. You'll also be able to select apps that you'd like to have update automatically. To do this, visit an app's details page from the Market on your device and check the box that says ‘Allow automatic updating’.
Keeping the option of making the Bluetooth in your phone ‘Discoverable’ also drains your battery & as well as a security risk.
Other features are the screen brightness can be reduced to what you find expectable. If your phone has the sensor that senses the ambient light to change the screen brightness check whether switching that off helps increasing your battery life. Using dark coloured themes or wall papers helps in reducing the drain on your battery as well as NOT using animated themes or wall papers.
A lot of Ace owners find the absence of ‘Profiles’ as they knew it in their older phones a bit perplexing/irritating, the easiest solution is to go in for a App that does the job but keep in mind to check ‘Permissions’) as I have found that many apps want rights to go where they have no business (IMO), of course that can be set at the top the page by selecting ‘Safe Search Strict’ (my choice). Also go in for an app which can be moved to the SD card or else it will just hog (already limited) space in your phone memory. For someone who just wants to put his/her phone on ‘Silent mode’ you can do it in the following way
- Thru the menu ‘Menu’->’Settings’->’Sound’-> ‘Silent mode’.
- Drag down your notification bar & touch the ‘Sound’ icon second from right which will go grey & become ‘Vibration’.
- Go to the ‘Tel’ icon (Green icon, first from left) on your home screen & then on the top there is a ‘Keypad’ tab which will bring on the number screen. Keep your finger on the ‘#’ button & your phone will vibrate & go into ‘Silent’ mode’.
The second & third option work for me as my settings is that the phone will vibrate on if silent mode is selected. ‘Menu’->’Settings’->’Sound’-> ‘Silent mode’
Screenshot:
To take screenshot of your phone press, up to android 2.3.4 it was home + back button. 2.3.5 onwards its power + home
To use your own MP3 as ringtone, sms tone or message tone. Create a folder on your SD card (internal or external work) and call it ‘Media’ folder. In that folder create a folder and name your ‘Audio’. In the audio folder, create three folders, named ‘Alarms’, ‘Notifications’ and ‘Ringtones’. In that folder you can put MP3s, suitable as alarm/notification/message tones or ringtones.
If you go to messages and press the menu button, you can go to Settings (at the bottom), select a ringtone for SMS.
To add music on your SD card make a folder called 'Music' in the following location Media\Audio\Music.
A shortcut for making calls or sending sms is when you have selected a contact (you can do this directly thru ‘Contacts’ or thru ‘Favorites’ or thru ‘Groups’. If you swipe a contact right to left you can go to composing a sms. If you swipe left to right you be calling that contact.
To move apps from internal memory go to the ‘Application Manager’, found by clicking menu then ‘Settings’ then ‘Applications’ then ‘Manage Applications’. In ‘Downloaded’ tap an apps & it will show whether it has a provision for moving each app. As long as the ‘Move to.. .’ button is not grayed out. Just go into the application manager and you'll see the 3rd party apps listed in one tab, along with "running" and "on sd card," etc. Else you can use the ‘App2SD’ mentioned below.
The menu path is a bit different from one Android phone to another, but you'll find it if you start looking around.
For people whose phone is not recognized after connecting to their PC thru the USB cable.
1. Connect the Phone to your laptop
2. From your phone, open the notifications bar and select the USB Connected option and you will get a screen saying Turn on USB Storage... Click on that and press ok in the pop up.. and when you see your android guy turn orange, you can find your phone in the Computer window.
If you still have problems reinstall KIES again & try. If the problem persists then it’s possible that the drivers were not installed properly go to C:\Program Files\Samsung\Kies\USB Driver . you wil find a file called ‘SAMSUNG_USB_Driver_for_Mobile_Phones’. Execute it (its an exe file) & then try again.
For those who miss the ‘Templates’ option which were present on their previous phones. Try this work around.
Another tip for those who miss templates I would suggest that the templates you had in your older phones (like me) which were used in sms replies can now stored as memo’s. When you want to use a template to reply to a sms do this. When you are viewing the sms you want to reply to tap on the compose option seen at the bottom (the keypad will pop up on your screen, ignore it), with the cursor in compose option tap the ‘Menu’ key (left of the ‘Home’ button) then tap on the ‘Add Text’ option you will get a menu with a title ‘Add Text’ with the following options ‘Contacts’, ‘Calendar’ &, ‘Memo’.
Tap on ‘Memo’ which will take you to your memos, go the relevant one select & copy then come back to your sms & paste. That’s it you are done. You won’t miss templates. Remember it means you can DIRECTLY insert contents of your ‘Contacts’, ‘Calendar’ &, ‘Memo’ into your sms or sms replies.
For those who assign different ringtones for groups or individual remember these points. If you assign ringtones to individuals then if/when you add them to a group, ensure that u assign a ringtone
ONLY to the group &
not to the individual as this has been observed to create problems of incorrect ringtone ringing. I had observed another glitch in my case some individuals who I had assigned a ringtone worked fine for the first call made by that person but for second & after, it would go to the default ringtone. At this time '
Classic Bell' was the default ringtone (factory set) now I have now changed the default to '
Pure Tone' (also Samsung provided) & everything seems to be holding out as of now.
For those who face the problem of corrupted memory cards may find this article interesting '6 data recovery tools for SD cards, USB drives and more' http://goo.gl/RjKyO
To allocate different sounds for different events say
battery low, battery full, app installation complete, USB
connected/disconnected sms/email/calendar event etc
For notification for battery low/full charge/temperature
notifications see
Battery Notifier (Big Text) by Shkil/larryvgs
Battery Monitor Widget by 3c
Battery Notifier by Dmytro Shkil
Battery Tune - Charge Alarm by Surreal Path
Battery alarm by Kunal Bhatia
Battery by MacroPinch
For notification of call/sms see
Ringo: Ringtones & Text Tones by Electric Pocket
You can set different notification sound alerts for email,
for calendar note and for SMS text messages.
SMS is simple: settings/sound/notification ringtone or use
Email: click on gmail (or other mail service provider) icon like when you want
to check on your mails./click menu key (left of the only button under the
screen)/more/settings/click on your account you want to change the sound
of/scroll down to email notifications and switch it on (if turned off) / labels
to notify/inbox/ringtone. Done!!!
Calendar: same things to do until you get into settings/here you can select
ringtones too!
There will be many more apps for other functions one has to spend time to
search for it.
So far I have used four apps which are
1) Jaxtrsms: which uses GPRS/3G or WiFi to send free sms to anyone, anywhere in the world even if they DO NOT use this app. I have been by & large successful in sending sms.
2) APP2SD: which can transfer apps installed on the phone memory to SD card (provided the app allows it)
3) Tiny Flashlight + LED: which allows the use of the phone LED as a torch.
4) MyPhoneExplorer: (
http://www.fjsoft.at/en/) which is the client for the s/w which I use as a suite for my phone. This s/w does all that Samsung KIES promises to do except updating the phone firmware & accessing Samsung apps.
A few observations about Jaxtrsms as on 22-1-2012. I noticed constant thru put in my GPRS (even when I am scrolling thru my phone menu) with a result I have shut down GPRS & switch on only when required. Other deficiencies are
a) When I send multiple numbers in an sms it would be nice to see them at a later stage. Currently I can only see the first name & part of the second name only no more.
b) Update 17-1-2012: None of my sms in the last 2 days seem to be reaching their destination :( Also noticed that the sms seem to reach Vodafone numbers but not Loop. Is it because the messages now come from LM which I think stands for Loop Mumbai!!!!!!!
c) Update 18-1-2012: Now I am quite sure that since this apps is using 'LM' for sending sms in India or at least in Mumbai Loop user do not receive sms from this apps:(
d) Update:20-1-2012 Updated the app on my phone & it now shows a 'D' next to a delivered SMS but sms sent to Loop Mobile customers still does not get thru even though it show the 'D' for delivered sign next to the sms :( very unhappy. Even when the sms gets delivered the ‘D’ sign does not change to ‘R’ as claimed.
e) I hope this is a temporary glitch & it will come out of Beta soon to live upto its promises of course service providers in India will have to cooperate. As it looks like they are now blocking sms from this app at their servers.
Updated from 2.3.4 to 2.3.6 today, 9th Mar 2012. Thru OTA & not thru KIES . Downloaded in less than 5 minutes but the installation took at least 30+ minutes. In fact I was wondering if the update had got stuck midway but it went thru slowly (patience in not my strong point). I noticed a few points immediately on starting.
1) Home screen clock display shifted to bottom.
2) New unlock system. Can be confusing as there no direction on what to do.
3) No problem (so far) in browsing thru the gallery.
4) There is a slight different in accessing the contacts/sms/logs. Basically the first three buttons frm the left side.
Just noticed that the ringtone for receiving a sms & the delivery report is the same - no matter what ringtone you have applied. Bloody inconvenient
&
When the phone gets fully charged I do not get s sound notification like in 2.3.4
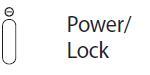
Samsung Galaxy Ace S5830 hard reset
Warning! All your data will be lost! Back UP everything first.
 +
+
Press and hold HOME + POWER/LOCK buttons together.
I installed & used the ‘Barcode scanner’, I found it
works well for QR codes but for bar codes I am underwhelmed by the results.
Since I am using this for the first time I wanted to mention my experiences
& find out if it’s the same for others or I am doing something wrong.
I scanned the bar code on a bottle of ‘
Sprite’ made by Coca Cola but I
don’t get the product details on my phone but asks me go to the web or google
search etc. which I did. See the result for yourself.
http://eandata.com/lookup/8901764032806/
yes its true a bottle of Sprite is called ‘
Natures Essence Spanish Spearmint
Exfoliating Face Wash’ for
that code. The country of origin & manufacturer is correct.
Next I tried it on
‘Vaseline Aloe Fresh Nourishing Lotion‘ see the url
below
http://www.urbantouch.com/vaseline-aloe-fresh-nourishing-lotion-300ml/8901030343674/p/
It was identified correctly but it took me to a online seller huh (which does
not make for accuracy) but do I have to go to the net for the details of every
item I scan? I expected that the entire product details like price etc would be
seen on the phone itself w/o any further ado. I wonder if there is there a
problem in what I am doing or is this s/w or country specific or is it an app
limitation?
Anyone knows any app which can do a good job of reading
qr/bar codes (especially bar codes) on Indian products. I also tried the one
mentioned above and
QuickMark Barcode Scanner
ixMAT Barcode Scanner
but was not impressed by either. Can’t an app just give me the product price
& other details in the code just like it does in the shop (to the shop
asst) during check out? I Installed 'Barcode scanner' again as a best of
a bad deal as it seems to be the most fuss free (at least I will now use it for
the QR codes when reqd) Maybe I will have to wait till someone makes an India
specific app.
I currently use the following apps on my phone which is now rooted.
1) Advanced English & Thesaurus
2) Barcode Scanner
3) Battery Notifier (Big Text)
3) Expense Manager
4) Barcode Scanner
5) First aid by British Red Cross
6) Opera Mini web browser
7) Simple Sound Profile Widget
8) Smart Compass
9) Smart Magnifier
10) Smart Measure
11) Smart Ruler
12) SMS Backup & Restore
13) sms Blocker - AWARD WINNER by Optinno Mobitech P. Ltd.
14) Tiny Flashlight + LED